Showing posts with label make. Show all posts

Wednesday, March 5, 2014

Make an end grain cutting board

One of the most popular woodworking projects

It seems that at one time or another, all woodworkers try their hands at making an end-grain cutting board. Its easy to understand why: cutting boards are useful, durable, allow you to really get creative on the design, and are simple to build.

Built by Mike D. (RetiredCoastie)
 on LumberJocks.com
And I have never made one. Its one of those projects thats been on my to-do list for a long time. As you may know, I love to cook and have been getting by for years with one of those thick plastic ones. Its built into my counter and slides out for use. The problem is that it gets mangled pretty quickly and doesnt clean well. After a while is begins to take on a permanent onion odor. Yuck. So I have to replace it every year.
Built by Jeff (jonasramus)
on LumberJocks.com

Wood cutting boards, on the other hand, will last nearly forever. The end grain of wood is very forgiving on knives and is actually more sanitary to use. The wood tends to heal itself. And if, after a lot of use, it starts to look really ragged and scratched, you can renew it just by resanding the surface.

I wasnt sure what more I had to offer in the way of a video, though. There are lots of cutting board videos. If you decide to make one, you definitely want to check out The Wood Whisperers video. He really takes you through every last detail and consideration.

Cutting Board Designer

Last month, Jeremy Greiner sent me a copy of a program he developed called Cutting Board Designer. After playing around with it for a while, I discovered how handy it is. It lets you lay out some complex patterns and get a good indication what your board will look like before you cut any wood. Check it out!

My first cutting board:


Read More..

Tuesday, March 4, 2014

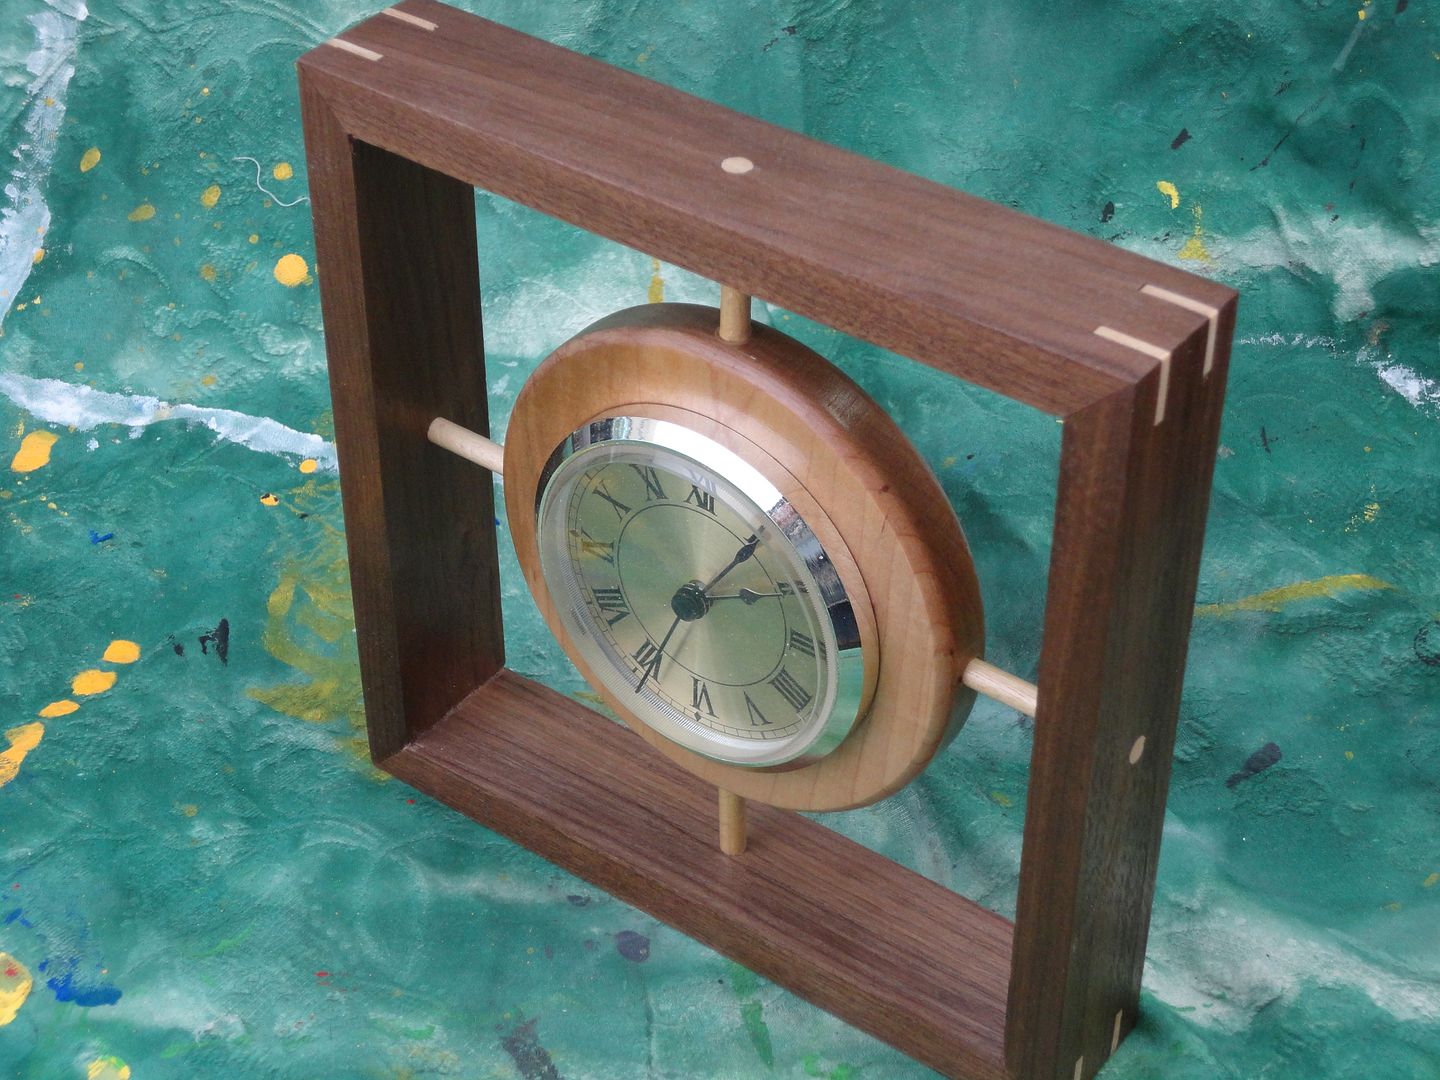
Make a wood clock

A video from the Non-Yankee Workshop.

Let me give you some back story on this project.

Last weekend, I started tossing around ideas for a BBQ caddy and planned on building it for this weeks show. You may be wondering why I would build a barbecue project in January. Well it is Summer in Australia and I have been working with Warren Downes to develop something for Australia Day coming up at the end of the month.

As we started hashing out ideas, I began to realize that this could make for a really fun video...especially since he offered to shoot some stuff Down Under. So I have tabled that project until I can come up with something good. That video and project will be on the 27th, just in time for the holiday.

New project

So I needed a project for this week. As I mentioned in my last post, Ive been saving the clock for this project for a long time. I started playing around with various pieces of scrap wood and sketching out a bunch of different designs. Eventually, the concept of a "floating" clock struck me. From there, it was actually pretty simple to execute. My main concern was how to make the holes in the circle perfectly straight and perpendicular. Boring them before cutting the circle is the solution.

I shot the video without any sound so I could add a soundtrack of some sort. It seemed simple enough that it didnt require me babbling on. After I edited it together I wanted to tack on an introduction and thought it would be funny to do it as a real woodworking show, complete with safety warnings and overly long instruction. I put on my Roy Underhill mustache and a ridiculously bad Southern accent. Then it hit me to include an incredibly verbose soundtrack on a video that needed none!

Copycat

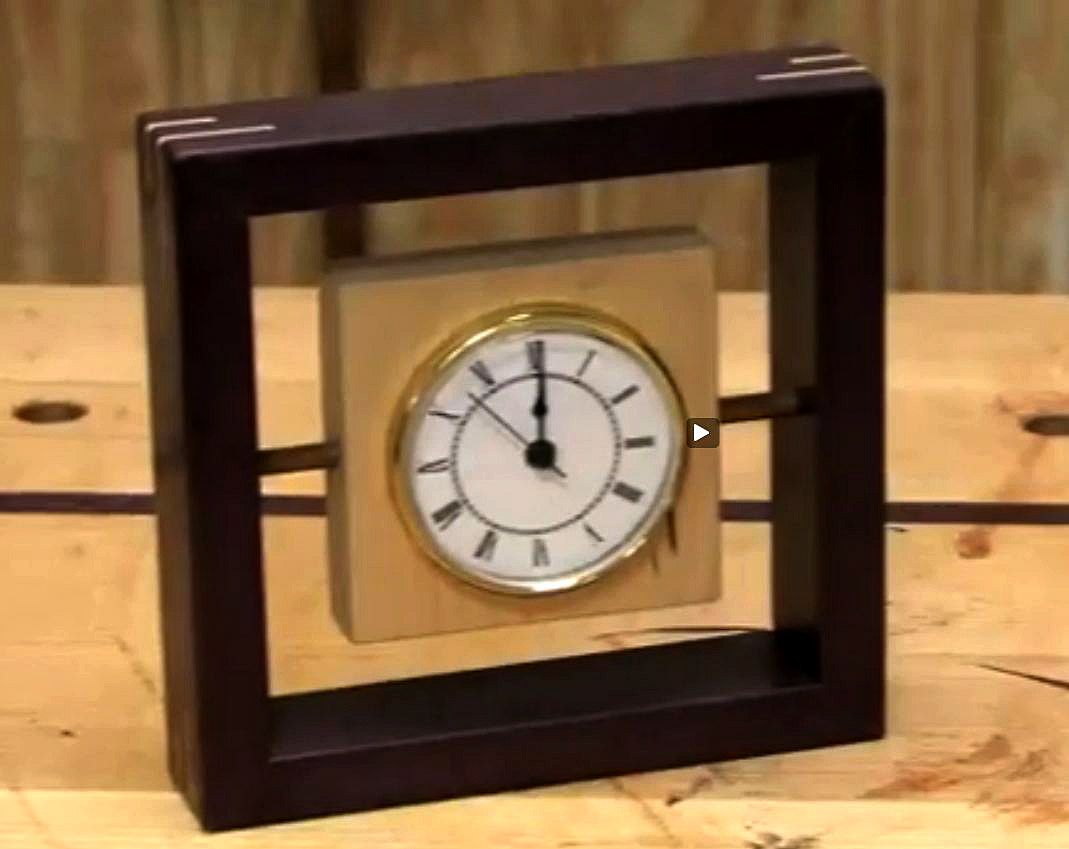
Now the strange part. After I posted the finished photo here and on Facebook a few days ago, a couple of people mentioned that it looked like one that Marc Spagnuolo made. My first thought was one of amusement: I couldnt imagine Marc making something so simple!

Well, more people mentioned the same thing, then a viewer sent me a link to The Wood Whisperers video. Yup. Sure enough, back in 2008, Marc made a clock that looks very similar to the one I just made. It is eerie: he used a dark wood for the frame and light wood for the floating center. Mine even has double splines on the corners, just like Marcs.

So wow. I guess I should familiarize myself with more of Marcs projects. Perhaps this is a design Ive seen somewhere before and was in my unconscious mind, just waiting to come out? Well Marc, sorry about the similarity. If I had seen your clock I certainly would have come up with a different project. But as it is, enjoy my take on the "floating clock".

*****


Read More..

Make a wooden wall hanging showing off where you live

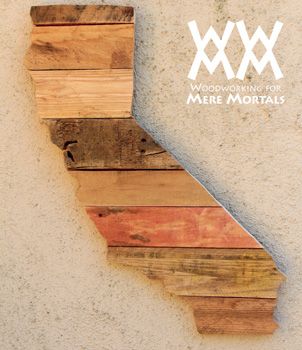
Been wondering what to do with all those tiny scraps of wood youve been saving? Heres a project you can make in no time flat. Gather up a mixed bag of cut-offs or pallet wood, glue them to a board and cut out the shape of your home state, province or country.

Make your own and post a video!
Shoot a short video of what you made and post it as a video response to my video on YouTube*. I think it will be fun to see all the places people are woodworking.

Find a map that you want by doing a quick Google Images search, print it out, paste it on your boards and cut it out with a jig saw, scroll saw, or band saw.

I made my home state out of various scraps of pallet wood. The interesting thing about pallets is that the wood all ages differently, giving you different hues and colors.

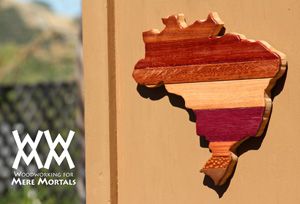
For my second cut-out, I used a map of Brazil. I wanted to give a shout-out to my Portuguese-speaking friends in South America. Over the years of doing Woodworking for Mere Mortals, I have made friends with quite a few Brazilian woodworkers who I have found to be among the most creative people I know. Olá amigos! Obrigado pelo vosso apoio. (I hope Google Translate didnt just mangle that!)


*****


*How to post a video response on YouTube

If you have never posted a video response before, it is not apparent how to do it on first glance. On most videos you will see a comment box:


Click anywhere inside the box and you will get an option to post a video response:


From there, you can upload a new video or choose one from your own channel. 


Read More..

Thursday, February 20, 2014

Rosewood Bowl discussion and plans and a good reason why I dont make square stuff

Hi Everyone,

Well, I went down to the wood shop today to start the rosewood bowl and to make a book stand for myself and my family. The bowl came out ok and the book stand is a mess and Ive dropped a clamp on my foot.

...sigh, here we go...

Indian rosewood is a hardwood that grows in tropical climates and it also grows in the US in Florida. The turning blank for this bowl came from Florida and is a really rich shade of reddish brown.

I started turning the outside of the bowl and this part of the turning went well:


I wanted to make this particular bowl with more of a fan-shaped profile and Im quite there yet so Im going to leave the faceplate on and turn it more tomorrow.


The past several days Ive had the bright idea to make a book stand to hold books, e-readers at an angle so I wouldnt have to hold them with my hands, as they usually hurt quite a bit after a long day in the shop.  And I made a complete mess of the whole thing:


And then to top the whole thing off, just as I was about to walk out of the shop, one of my pipe clamps fell right on the middle of my right foot. It dropped out of its rack and does that ever hurt!

Im hot, tired, and limping all over the place. 

Oh well, Ill try it again tomorrow.

VW
Read More..

Wednesday, February 19, 2014

Snow today good day to get down to the wood shop and make something!!

Hi Everyone,

Well, its getting cold again and the weather folks tell us that the Twin Cities is about to get clobbered by a snow storm:


Well bring it on--time to get down to the wood shop and go to work!! Yea baby!!

More laminated bowls-Discussion and Plans

For those of you who follow the blog regularly, youll know that I got a giant pile of hickory as a Christmas present last year and Ive been working on using it up. That means using that wood as efficiently as possible so Ive been doing a lot of laminating of late. My latest two efforts revolve around
using up some of the larger flat boards and some of the small pieces that I have so were going to make a medium-sized salad bowl and a nut bowl. Heres how:

Salad bowl

When I laminate wood I generally orient the flat face of the individual wood pieces vertically because I  really love the way that this type of laminated block looks. It emphasizes the grain and because laminated blocks are made of separate pieces of wood, I can play around with grain patterns and color. This time however, Im going to orient the faces horizontally like a stack of pancakes.

So Ive dug into the wood pile and extracted several hickory boards on the basis of the width of the board and its color:


And Im going to add a section of walnut that will become the rim of the bowl.

Next, were going to cut these boards into 11 1/2" wide sections on the table saw:


After several minutes of measuring and cutting I had my bowl blank ready to go. Its going to consist of three layers of hickory and a top layer of walnut for the rim:


Im going to take this inside and glue it later on today. I think this will result in a very cool looking bowl.

While I was at it I came across that piece of monkey puzzle wood I got for Christmas and I cut it into medium-sized blanks that will eventually become a pair of bowls for some lucky person:


Monkey puzzle wood (and no, I dont know why its called that) is a tree that grows in tropical regions and this particular piece came from Florida. Its supposed to be very irritating wood to work with but so far so good. Well see what happens.

Next, since I wasnt completely frozen through, I decided to take some of the small pieces of hickory that I have and make a blank to make a nut bowl out of.

Hickory is a wonderful wood. The color ranges from butter yellow to deep browns, greens, and even wine reds and pinks and its ideal for any type of wood turning. Its also great for laminations because the color varies so much. So its a very good wood and it also has a wonderful scent. My shop smells great.

I cut up the smaller pieces and assembled them and didnt quite have enough pieces to make the blank as wide as I needed it so I cut more hickory and then I remembered a very thin piece of rosewood that I bought last year:


...and I cut it down and added it to the bowl blank:


Even though this is a very thin piece of wood, it was hard to cut it on the table saw.


Here is the bowl stack at present:

Once this is glued up, it will make a very nice nut bowl.

Since its beginning to get really cold, Im going to stop and take the laminating blanks inside so they can warm up. Hickory is a very dense wood and if its too cold, the glue wont dry so everything has to warm up to at least 65 degrees before I can laminate it. Thats ok as I think its time to stop and get something hot to drink.

Im going to glue up at least one of the bowl blanks tonight, probably the nut bowl. As soon as Im ready to put it on the lathe, Ill let you know with another posting.

And another bit of news: I found out Im on the deans list at school--not bad for a wood shop critter!! I think Ill reward myself by going out and buying some red-colored wood!

Thanks for stopping by for a visit. Come back again soon as we always have more adventures in the wood shop.  Ill see you soon.

VW


Read More..

Monday, February 3, 2014

Description how to make woodworking plans

Get how to make woodworking plans its good

How To Make Woodworking Plans

How to make an easy beeswax lotion | a sonoma garden, You use something like 8 tbsp lavender & 1 cup oil. put it in a mason jar in a sunny spot. strain the lavender the next day and squeeze out all the oil. Fine woodworking - official site, Created by woodworkers for woodworkers. practical information about techniques, tools and materials for the professional cabinetmaker or those just starting out.. Rockler - woodworking tools supplies hardware plans, Shop for woodworking tools, plans, finishing and hardware online at rockler woodworking and hardware. find thousands of woodworking supplies like drawer slides.

Instructables - diy how to make instructions, Web-based documentation platform where people share what they do and how they do it, and learn from and collaborate with others.. How to install a wood burning stove, wood burning boiler, Wood burning stove. wood burning boiler. installation guide. fitting a lintel over a fireplace. enlarging fireplace. plumbing in log boiler. How to videos: instructional, diy & how to video | ehow, Developing your lower quad is something you can do by targeting the area with the right kinds of exercise. find out about an exercise that you can do to develop the.

How-to projects - lowe's, Help; weekly ads; gift cards; for pros; credit card services. activate your card; pay your bill; manage your account; apply now; current offers; prices, promotions. Cmu: flip’s free woodworking plans, Free woodworking plans. below you will find some of the free woodworking plans to be found on the net. much of the information was gathered from the newsgroup rec. How to write a research project grant application, Table of contents (click to jump to sections) introduction strategy for getting an nih grant writing an application for a research project grant.


Nice how to make woodworking plans its good


how to make woodworking plans
,

8 out of 10 based on 64 ratings
Read More..

Thursday, January 23, 2014

How to make a planter box out of cedar fence pickets

My wife asked me to make a planter box for our front porch.  I showed her the Ice Chest/Cooler box and said imagine this wider and shallower.  She like the basic idea but wanted it lower to the ground and shallower.  I redesigned the box to fit her wishes and came up with the planter below.  I used 6 - 1 x 6 x 72 cedar fence pickets to make this planter.

I started out by setting up a stop block on my miter saw at 16".

I cut the bottoms off of all 6 pickets to use as legs.  This leaves me with six 56" boards.

I then cut three of these at 39".  These will be used for the sides.  I ripped one board into two 2 1/2" strips.  Each side will have one 5 1/2" board and one 2 1/2" board.

I reset the stop block at 13".  I got three pieces from the leftover after cutting the 39" pieces and then got eight more from two more pickets with the bottom cut off.  This leaves me with one more picket at a length of 56".

This gave me 11 boards to work with.  I will be using 3 for the ends and 8 for the bottom.

I set my table saw at 2 1/2" to rip the legs and the boards for the sides and end.

I ripped four legs at 2 1/2" and one of the 39" sides into two 2 1/2" wide boards and one of the 13" ends into two 2 1/2" wide boards.  I made sure to keep the two pieces of each leg together to make matching legs.

I took the two remaining legs and ripped them to 3" wide to be used in the center.

I left the stop block set at 13" and adjusted my miter saw to 45 degrees and cut both sides of the center legs.

Here are all the pieces cut except for the top frame.

Make sure to make 2 left legs and 2 right legs.

I built the legs using glue, a nail gun, and clamps.

I let the legs sit for 2 hours while the glue set.

Once the legs were dry I put a slight chamfer on all the exposed edges to soften the look and minimize splinters.  I also chamfered the pieces to go on the bottom to help with drainage.


Here are all the pieces chamfered, sanded to 120 grit, and ready for assembly.

I started with the short ends so that the bottom pieces will be the right length to stretch across.  I also setup the legs so that the joint will be facing the short side.  When you look at the long side of the planter you will only see the full 3" side.

I glued and screwed the 13" boards to the top section of the legs.  I put the 5 1/2" section on the bottom.  The floor pieces will be screwed into this so I wanted them attached to a board with more screws in the legs.  I couldnt find any coated deck screws in a 1" length so I had to use drywall screws.

I then took the two sides and glued and screwed in the 39" boards.

I marked the center of the side and the center of the middle leg.

I applied some glue and then clamped it in place.

I then set the planter on its side and pre drilled & counter sunk the holes.

I then screwed the legs to the side..   

All assembled and ready for stain.

I went with a light cherry stain.

I took the last remaining 56" piece of picket and cut it into one 14" length and one 41" length.  I ripped each of those into two 2 1/2" wide boards and then cut the ends at 45 degrees for a frame for the top. 

I attached the frame to the top using glues, 1 1/2" brads and clamps.  I applied a heavy coat of indoor/outdoor spar urethane to the entire planter inside and out.  Please note that the floor has not been installed yet.

The floor consists of seven 13" full boards and one more cut to fit.  I applied two heavy coats of indoor/outdoor urethane to these.

Here is the floor ready for assembly.

Here is the chamfer I made earlier.  I am hoping that this will work for drainage.

I predrilled,

and screwed the floor in.  No glue.

Here is another look at one of the chamfers. 

Once the floor was installed I put one more coat of the spar urethane on the whole thing.  It is now ready to be installed.

Now we just need to put some flowers in it.

Read More..