Tuesday, March 4, 2014
Make a wood clock
Let me give you some back story on this project.
Last weekend, I started tossing around ideas for a BBQ caddy and planned on building it for this weeks show. You may be wondering why I would build a barbecue project in January. Well it is Summer in Australia and I have been working with Warren Downes to develop something for Australia Day coming up at the end of the month.
As we started hashing out ideas, I began to realize that this could make for a really fun video...especially since he offered to shoot some stuff Down Under. So I have tabled that project until I can come up with something good. That video and project will be on the 27th, just in time for the holiday.
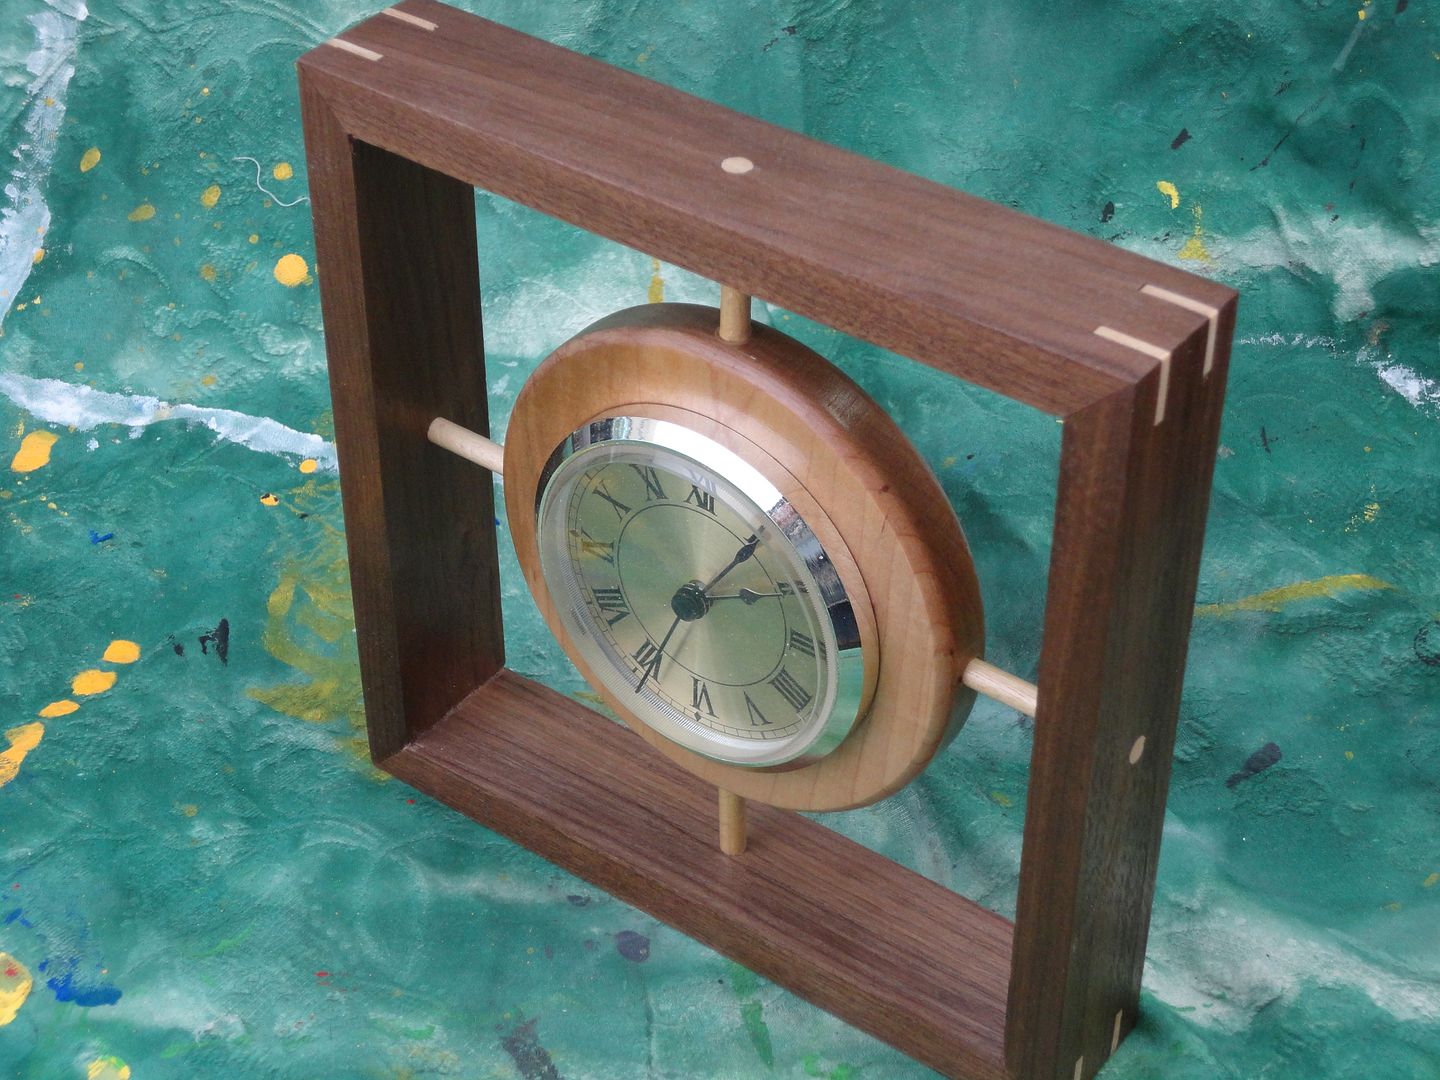
So I needed a project for this week. As I mentioned in my last post, Ive been saving the clock for this project for a long time. I started playing around with various pieces of scrap wood and sketching out a bunch of different designs. Eventually, the concept of a "floating" clock struck me. From there, it was actually pretty simple to execute. My main concern was how to make the holes in the circle perfectly straight and perpendicular. Boring them before cutting the circle is the solution.
I shot the video without any sound so I could add a soundtrack of some sort. It seemed simple enough that it didnt require me babbling on. After I edited it together I wanted to tack on an introduction and thought it would be funny to do it as a real woodworking show, complete with safety warnings and overly long instruction. I put on my Roy Underhill mustache and a ridiculously bad Southern accent. Then it hit me to include an incredibly verbose soundtrack on a video that needed none!
Copycat
Now the strange part. After I posted the finished photo here and on Facebook a few days ago, a couple of people mentioned that it looked like one that Marc Spagnuolo made. My first thought was one of amusement: I couldnt imagine Marc making something so simple!
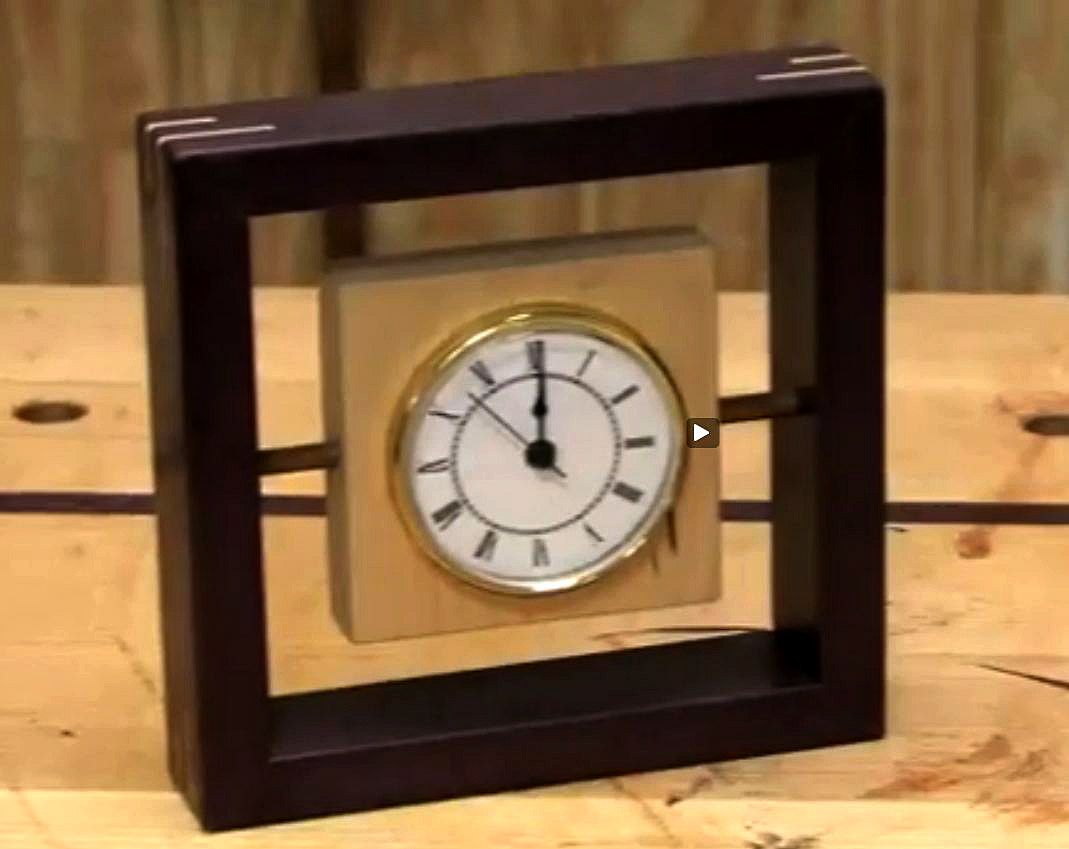
So wow. I guess I should familiarize myself with more of Marcs projects. Perhaps this is a design Ive seen somewhere before and was in my unconscious mind, just waiting to come out? Well Marc, sorry about the similarity. If I had seen your clock I certainly would have come up with a different project. But as it is, enjoy my take on the "floating clock".
*****

How To Prepare For A New Finish
Before starting the work, make a thorough inspection of the piece after you have removed the old finish. You may find holes, dents, cracks and other damage that were not previously visible in the surface that will require repairs before preparing for the new finish.
Some of the procedures for preparing the surface are seldom used, but are included to give you full knowledge of them. They are bleaching, scraping, sanding, staining, and filling.The choice of those to be used for a single job are determined by the type and condition of the wood, after the old finish has been removed. Some are necessary according to conditions and some are a matter of choice.
BLEACHING
Bleaching is used today mostly to remove undesirable stains. After the old finish has been removed, any darkened or discolored spots that remain can be lightened or entirely removed by the proper use of bleach. When working with pine or maple, it is best to remove discoloration and freshen up the surface.
Types of Bleaches
There are four common bleaches used by home handymen to lighten wood or remove undesirable stains. They are: PREPARED BLEACH, The simplest method of getting a good bleach is to buy a prepared bleach, which usually comes in the form of two solutions that may be applied successively or mixed together, according to directions on the label.These bleaches are sold in some paint stores or through mail order outlets. HOUSEHOLD PRODUCTS, Sometimes a laundry bleach in which sodium hypo-chlorite is the bleaching agent is effective for such woods as walnut, maple, and gum. Household ammonia is a good bleaching for all but dark woods,however,it is best for spot work only. OXALIC ACID, This bleach works only when a mild bleach is needed. It can be used successfully for such open-grained woods as oak, chestnut, and ash.Some professional strippers use it routinely to remove slight discolorations during the stripping process. HYDROGEN PEROXIDE, Probably the most satisfactory but most expensive bleaches are these based on a strong solution of hydrogen peroxide 30 or 35 percent. This commercial-grade bleach should not be confused with the 3 percent solution used as an antiseptic.
Using Prepared Beach
This two-solution bleach must be intermixed or applied in successive steps. All contain strong chemicals so its important that you wear rubber gloves to protect your hands. An apron or old clothing should also be worn since these bleaches will attack most fabrics and follow the label directions carefully. These are best for overall work. They are difficult to control when spot bleaching. The bleach can be applied with a brush or sponge and should be allowed to dry on the surface until the desired effect is reached. The instructions will tell you whether neutralization or rinsing is required. After bleaching and rinsing is completed, the piece should be allowed to stand until completely dry. Then sand lightly with a very fine sandpaper to remove raised grain. Be careful not to sand more deeply than the bleach has penetrated.
Using Household Products
Most household products are better for spot work. This is how to use laundry bleach and ammonia as bleaching agents. First,apply the product full strength over the spot or surface of the wood. Next, wash the product off with clear water after it has been on the surface about 15 minutes. Check to see if the desired color has been attained. If not, repeat the treatment. When the right color has been achieved, rinse the entire surface with water. Let the furniture stand to dry for at least 48 hours.
Using Oxalic Acid
Oxalic acid can be purchased at a drugstore or in some paint stores. It comes in powder or crystal form. Start by dissolving 1 ounce of powder or 2 ounces of crystals in a pint of very hot water. Using a large brush, apply the solution hot to the entire surface from which the finish has been removed. Let the solution remain for 10 to 20 minutes and then wipe it off with a damp cloth. Repeat if necessary to reach the color you are after. When the proper result is reached, wash off with 1 part ammonia in 10 parts of water. This will neutralize the bleach and stop its further action.Then wash with clear water and let it dry for at least 24 hours.
SANDING AND SMOOTHING
The smoothing of a wood surface is done with sandpaper by first working with relatively coarse papers, followed by those of finer grit. Steel wool is often used for final smoothing.
Rules For Sanding
The sanding of a wood surface is the least difficult of all the procedures, yet it is one of the most important parts of refinishing and must always be done thoroughly and with great care. When sanding, remember these three rules. First always sand with the grain of the wood--never across the grain.Second, use straight strokes with an even pressure, avoiding a twisting or circular motion, and last, use a paper of as coarse a grit as the wood will stand without scratching, then finer ones until the surface is as smooth as the wood will become. After sanding with the finest grit paper, use a steel wool pad for the final smoothing. After using the steel wool, all dust must be removed by wiping with a tack rag. This is a cloth that is treated to attract and hold dust. It is usually available at pant dealers that handle wood finishes.
Many sources an be found at the public library for furniture refinishing.
Article Source: [http://EzineArticles.com/?How-To-Prepare-For-A-New-Finish&id=6713102] How To Prepare For A New Finish
Make a wooden wall hanging showing off where you live
Make your own and post a video!
Shoot a short video of what you made and post it as a video response to my video on YouTube*. I think it will be fun to see all the places people are woodworking.
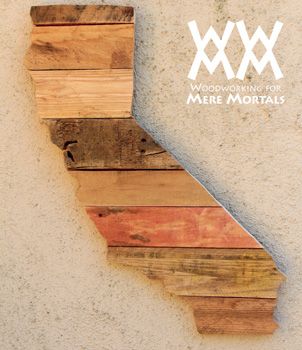
Find a map that you want by doing a quick Google Images search, print it out, paste it on your boards and cut it out with a jig saw, scroll saw, or band saw.
I made my home state out of various scraps of pallet wood. The interesting thing about pallets is that the wood all ages differently, giving you different hues and colors.
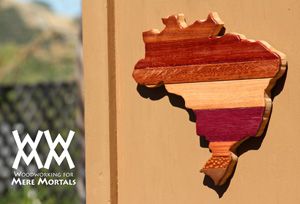
For my second cut-out, I used a map of Brazil. I wanted to give a shout-out to my Portuguese-speaking friends in South America. Over the years of doing Woodworking for Mere Mortals, I have made friends with quite a few Brazilian woodworkers who I have found to be among the most creative people I know. Olá amigos! Obrigado pelo vosso apoio. (I hope Google Translate didnt just mangle that!)
*How to post a video response on YouTube
If you have never posted a video response before, it is not apparent how to do it on first glance. On most videos you will see a comment box:

Click anywhere inside the box and you will get an option to post a video response:

Sunday, March 2, 2014
A Celebration of Spring

Spring has finally sprung and to celebrate its arrival (finally), I couldnt think of better dish to prepare, or share, than Spring Green Risotto. Loaded with asparagus, leeks, sweet baby peas, chives and fennel, it really is a wonderful dish to enjoy with family on a lovely spring afternoon. Happy Spring!
Saturday, March 1, 2014
Vintage Home Favorites A New Feature
Im starting up a fun little feature here on Our Vintage Home Love! This feature will consist of things that we love, that could be anything we think youll love, too, that will make you smile, make your life easier, mundane tasks more enjoyable, or a recipe that we are crazy about and would like to share. I will blog about these things every other Friday and Im really looking forward to it, cause when I find something I love, nothing makes me happier than telling everyone else about it so they can, perhaps, enjoy it, too!
To kick off this feature, I want to blog about something that I just bought that I am crazy about! Sasha, over at Lemonade Makin Mama, makes and sells these adorable Wine and Cheese bags in her Etsy Shop and I just had to buy one after I saw them on her blog. I just love her blog. She is a tremendous inspiration to me and she takes the most beautiful photos, not to mention how incredibly talented she is. Well, when mine came in the mail, I jumped for joy when I opened the package. It is so adorable!


You can order a bag for yourself by clicking here! I also ordered her EAT napkins because I found the perfect little vintage basket for cloth napkins at a flea market for a quarter!! I cant wait! Sasha makes beautiful things so make sure you check out the rest of her shop, too!!
Have a great weekend everyone! The winner of the mini bread board set will be randomly selected and announced tomorrow so check back!
Monday, February 24, 2014
SUPER GIVE A WAY workshop


Friday, February 21, 2014
How To Be A Woodworker Woodworking Plans
How To Be A Woodworker
Woodworking Plans
Do-it-Yourself Patterns and Crafts, Woodworking kits, Furniture Plans Plus Much, Much More. Will Show You How to Make 16,000 Different Woodworking Plans. Use The Plans For Fun, Functionality or Profit!
How To Be A Woodworker. Wood is a single of the most attractive, durable and versatile materials that you can operate with although on a do it oneself project. The beauty of a cabinet door that is finished in wood can not be matched by any other material no matter if all-natural or man created. As with any project, you would call for a detailed set of plans whilst you perform with wood and wood primarily based components. This is why it is encouraged that you use a detailed set of woodworking plans as soon as you program to extensively use wood based materials to full the project that you have embarked on.
Now let us examine why woodworking plans are very important in any wood primarily based do it oneself project. To commence with, these plans assistance you eradicate waste. If you start a woodworking project without having a firm program, the probabilities are that you would end up working with additional wood that you originally intended to. Most of the wood primarily based projects would call for in depth assemblies and sub assemblies.
When you start your project, you would be ideally working with individual members of wood and finishing them individually before assembling them. If you do not have the suitable woodwork plans, you could finish up with mismatching wood members at the time of assembly. This could lead to high-priced price and time overruns in the project. All these issues can be avoided by utilizing a effectively laid out set of wood plans.
The other advantage that you could have if you use woodworking plans are that you would be prepared with all the tools and implements that you would demand for finishing the wood based project. Frequently we find that we do not have access to a specific tool in the middle of a woodworking project. This predicament could lead to a loss of time and sometimes you may possibly even have to abandon the project in case a unique tool is not out there. All these difficulties can be avoided if you have a detailed strategy at the onset. How To Be A Woodworker

How To Be A Woodworker Datum
Consistent Advertising - The romance of woodworking will have to have to be balanced with the constant promoting and marketing important to retain the operate coming in. In time, phrase of mouth brings in a lot of operate if you develop a good reputation. Till lastly then, you will need to get the phrase out routinely. Right after the work arrives in you have to have excellent manufacturing systems so you can complete the tasks promptly and continue to maintain the cash flowing. If jobs take into account also incredibly extended and the dollars movement stops, it can turn into difficult to shell out the costs. Talking of dollars flow, you really should build and adhere to common assortment techniques. This is 1 area where by various woodworkers fail. The payment for the execute will need to have to be as vital as the execute by itself. If you are lax in accumulating, you will run into prospects who fall quick to shell out you and this will lead to seriously critical income movement issues.The Compact enterprise - Even having said that you like woodworking, you will need to do the dwelling business enterprise if you are to make a dwelling at it. Superior outcomes commonly needs an in-depth information of both woodworking and small business management. If you under no circumstances have each and every, I recommend you hesitate to leap in until you have honed your enterprise abilities.
Looking back again I recognize that my lack of understanding in the course of my startup rather a handful of decades back could have been offset with some frequent information and a further individual to advise me.Sadly I had to understand most components by trial and error.
Just about just about every and every and just about every week, I take the time to go by choice of the comments that my viewers make about my woodworking web site. 1st of all I want to them for taking the time to comment, I certainly value all of the comments and guidelines. This previous week there was a comment from a gentleman, who expressed a require to get into woodworking. As a man who is passionate about woodworking, I want to welcome him to the fold. And I want to give you him all of the recommendations and encouragement probable in his endeavors.How To Be A Woodworker
More How To Be A Woodworker :
Tag : How Do You How To Be A Woodworker, How To Get Rid Off How To Be A Woodworker, Affordable How To Be A Woodworker, Where To Buy How To Be A Woodworker, Where To Purchase How To Be A Woodworker.
Thursday, February 20, 2014
Rosewood Bowl discussion and plans and a good reason why I dont make square stuff
Well, I went down to the wood shop today to start the rosewood bowl and to make a book stand for myself and my family. The bowl came out ok and the book stand is a mess and Ive dropped a clamp on my foot.
...sigh, here we go...
Indian rosewood is a hardwood that grows in tropical climates and it also grows in the US in Florida. The turning blank for this bowl came from Florida and is a really rich shade of reddish brown.
I started turning the outside of the bowl and this part of the turning went well:


I wanted to make this particular bowl with more of a fan-shaped profile and Im quite there yet so Im going to leave the faceplate on and turn it more tomorrow.
The past several days Ive had the bright idea to make a book stand to hold books, e-readers at an angle so I wouldnt have to hold them with my hands, as they usually hurt quite a bit after a long day in the shop. And I made a complete mess of the whole thing:

Oh well, Ill try it again tomorrow.
VW
Wednesday, February 19, 2014
A Whole Nest Of Dovetails
As it turns out, My fears were unbased. The panels are 23 3/4" tall, and I could pass almost 25" in between the screws. A small beginning victory is not a bad way to begin.

Because I wanted to make all four corners the same I decided to use one other old dovetailing layout trick. I made a story stick where I played with and pre-laid out the spacing for the pins and tails.
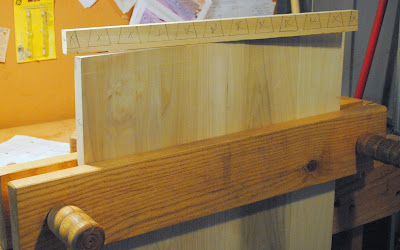

Then it was down to some quality time with my dovetail saw.

I love this picture, lines of sawdust as I work my way down cutting one side of every tail. After this I work my way back cutting the other side.

I use a coping saw to remove most of my waste, and then clean up the bottoms of the tail with a little chisel work.

With everything refined, I give the joint a test fit. Only halfway, I dont want to push anything too far and halfway should be enough to tell if youre going to have any real problems.

Repeat another four times, and you have a carcass to glue up.

The next day, after the glue dries. Clean up them tails.

Then you get to work putting a bottom on it.
Ratione et Passionis
Oldwolf
Monday, February 17, 2014
How To Deck Deck Plans Build a Deck
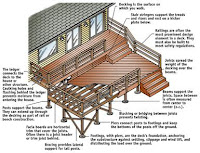
Deck Plans - Build a Deck
A deck will greatly improve your home more attractive and comfortable.Do You Need A Permit To Build A Deck?
Thursday, February 13, 2014
Build a Case for your Books with your Friends
 |
| The One & Two Sheet Bookcase |
a gate leg walnut console


email note from a relative below ...
Wednesday, February 12, 2014
Making a Jarvi Bench video
Tuesday, February 11, 2014
Plane On A Stick
Well, blogging continues to take a backseat to the ongoing bamboo floor project. I cannot believe how time consuming it is! My only consolation is that it sure looks great! But man-o-man, slow, slow, s-l-o-w! Glad I didn’t really know about this ahead of time – I never would have started…
One unexpected bright spot was actually getting to use my Stanley #70. This did not start out as a good thing – it’s amazing what a carpet and pad can hide. The plywood sub-floor was all over the map in terms of flat and smooth. I spent a lot more time fixing it than I anticipated – “I’ll just tear this carpet up and put down the bamboo. Simple.” Yeah, right. Anyway, some high spots were okay after screwing them down tight, but some were not. A few sheets of the plywood were thicker than the others (Apparent motto of the original construction guys: “Can’t see it from my house!”) and the abrupt edge had to be eased into a wide bevel that the flooring could cope with. Enter the #70 – “Plane-On-A-Stick!”
I had bought this years ago. Didn’t really need it, other than some vague idea it might be usable for Windsor chair seats. But it was in great shape at a good price, and it looked lonely and unloved. It has been sitting on the shelf in the shop waiting to get in the game, and now its day had come. And what a champ! Worked perfectly! Almost made the flooring job fun. Almost.

The plane end rotates, and can be used both pulling and pushing.


Cool! But after this job is done, it’s back to the shelf for a long while. The bamboo for the kitchen floor is on hold whilst I rebuild my depleted store of motivation and a team of chiropractors and physical therapists straighten my back.
Monday, February 10, 2014
A House In The Trees Part VIII
I framed the clear-story to accommodate the windows Im going to fabricated using some Kalwall samples I have. Im not yet sure if the main roof will receive a skylight or not, but if it does I wont bother to cut out the rafters within the skylight footprint. It is, after all, just a tree house.
a walnut pedestal table


GO RED SOX !!!
update 11/4 ... installed the table last week .. looks good onsite ...

